

Someone fills out your contact form at 9pm on a Saturday. They don’t hear back until Monday afternoon — by which point they’ve probably already emailed one of your competitors too. This tutorial fixes that: you’ll learn how to automate form reply emails so that every Google Form submission gets logged to a spreadsheet and answered with a personal-sounding email automatically, without you touching your inbox. It takes about 20 minutes to set up, and you won’t write a single line of code.
What you’ll need
- A Google account (free) — you’ll use Google Forms, Google Sheets, and Gmail
- A Google Form that’s already collecting a name and an email address. If you don’t have one yet, Step 1 below covers what to add.
- A Make.com account (free plan works for this — more on its limits below)
- Time: about 20–25 minutes
- Difficulty: Beginner — this is entirely point-and-click
A quick note on Make’s free plan, so there are no surprises: as of September 2026 it includes 1,000 operations per month (Make’s pricing page currently labels these “credits”), a cap of 2 active scenarios, and a 15-minute minimum interval between scenario runs. For a low-volume contact form, that’s normally plenty — it just means replies go out within about 15 minutes rather than instantly. If you’re getting dozens of submissions a day, you’ll want to check Make’s current paid tiers before relying on this long-term. (Make.com Pricing)
Build the automation
1. Confirm your Google Form collects a name and email address
Open your form in Google Forms and check it has at least two questions: one for the respondent’s name, and one that captures a real email address — either a Short answer question or Google Forms’ built-in Collect email addresses setting (under the form’s Settings tab). You need this because the automation has to know where to send the reply. Skip this step only if you’ve already confirmed the field exists.
2. Create a new scenario in Make.com
Log in to Make.com, go to Scenarios, and click Create a new scenario. This opens a blank canvas — this is where you’ll build the whole automation, step by step, as a chain of connected modules.
3. Add the Google Forms trigger
Click the + button on the canvas, search for Google Forms, and select it. From the list of available modules, choose Watch Responses — this is the trigger that starts the scenario every time someone submits your form.
One thing worth knowing: this trigger works by Make periodically checking your form for new responses (called polling), not by an instant push notification. On the free plan that check happens every 15 minutes, so a reply won’t land in someone’s inbox the second they hit submit — but it’ll be there well before you’d have gotten to it manually.
4. Connect your Google account
Make will prompt you to Add a connection. Click it, sign in with the Google account that owns your form, and approve the permissions Make asks for. This is standard Google OAuth — Make never sees your password, only the access you explicitly grant.
5. Choose your form and run a test
In the module’s settings, select the specific form you want to watch from the dropdown, then click Run once at the bottom of the canvas and submit a test response to your live form. This confirms Make can actually see your form’s responses before you build anything on top of it.
6. Add a Google Sheets module to log the response
Click the + on the right side of the Google Forms module, search for Google Sheets, and add the Add a Row action. This is what keeps a permanent, searchable record of every submission — handy later even once the auto-reply is working, since you’ll have a running log without checking your inbox.
7. Map the form fields into your sheet
Connect your Google account again if prompted, then pick the spreadsheet and sheet tab you want to log into (create a blank one first if you don’t have one — a header row with Name, Email, Message, Submitted At works well). In each column field, click into the box and select the matching value from the Google Forms trigger’s output — Make shows you the form’s actual field names to choose from, so you’re not typing anything by hand.
8. Add a Gmail module to send the reply
Click the + after the Google Sheets module, search for Gmail, and add the Send an Email action. This runs immediately after the row is logged, so the record and the reply always stay in sync.
9. Write and map your reply email
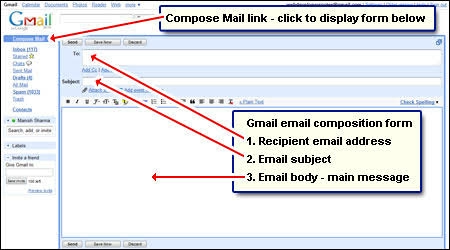
In the To field, map the email address field from your Google Form trigger — don’t type an address here, or every reply will go to the same person. Write a short, genuinely helpful subject line and body (for example: “Thanks for reaching out, {{Name}} — we got your message”), using the mapped Name field so the email doesn’t read as a form letter. Keep it honest about what happens next — “we’ll follow up within one business day” only if that’s actually true for your business.
10. Test the full scenario
Click Run once again and submit another test response to your form. Check that the row appeared in your Google Sheet and that the reply email landed in your test inbox (check spam the first time — new automated senders sometimes land there before Gmail learns to trust them).
11. Turn on your scenario
Once the test works, toggle the scenario to ON in the top-left corner of the editor. From this point on, every form submission logs itself and gets an instant-ish reply without you doing anything.
Common mistakes
- Replies take 15 minutes to arrive, not seconds. This isn’t a bug — the Google Forms trigger polls on a schedule, and the free plan’s minimum interval is 15 minutes. If you need faster turnaround, that requires a paid Make plan with a shorter polling interval.
- The Gmail step fails silently or sends to the wrong address. This almost always means the
Tofield isn’t mapped to a real email value — double-check your form actually has a proper email question, and that you selected that field (not a name or comment field) when mapping. - You get duplicate rows or duplicate emails for one submission. Make’s community has reported this happening with the Google Forms trigger under certain conditions. If you see it, check you don’t have two versions of the same scenario active at once, and confirm the trigger’s “already processed” bookmark hasn’t been reset.
- The scenario silently stops running. Google connections in Make occasionally need re-authorizing. If replies stop going out, open the scenario and check both the Google Forms and Gmail modules show a healthy, connected account.
- You hit Gmail’s daily sending cap. A personal Gmail account is limited to 500 emails sent per day. Fine for most small business contact forms, but worth knowing if you ever run a high-volume campaign through the same account. (Google’s sending limits)
Recap and next step
You now have a working automation: every Google Form submission gets logged to a Google Sheet for your records and triggers a personalized reply email through Gmail — all without you opening your inbox. The whole chain runs on Make’s free plan as long as your volume stays under 1,000 operations a month.
If you’d rather not build this by hand, grab the ready-made blueprint here: [ADD LINK — Free Make.com template: “Form Submission Auto-Reply,” once built and saved]. Import it into Make, reconnect your own Google and Gmail accounts, and you’ll skip straight to Step 5. And if you’d like this — or something more advanced, like routing replies based on what the person selected in the form — set up and maintained for you, that’s exactly the kind of thing we handle in our done-for-you builds.

Leave a Reply